I am gearing up for the Global Game Jam and I decided to improve my boilerplate code. I made a nifty loading screen, Browserified the whole thing and rearranged my folders.

I decided it would be nice to add a menu screen, mostly because I don’t want to waste time creating one during the jam. You can download the image assets that we will be using here.
###The basic idea
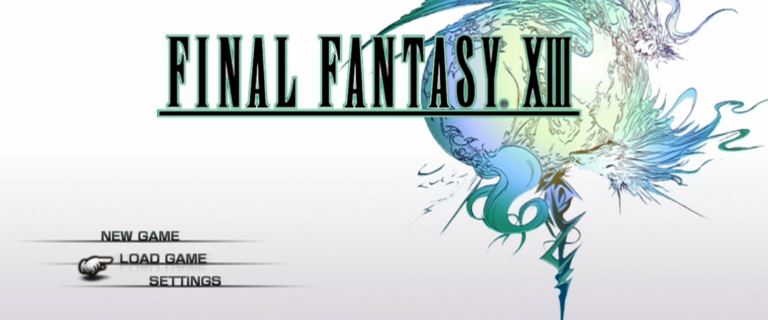
I wanted to make a menu that accepted keyboard and mouse input, kinda like the 16-bit console era menus for Final Fantasy and Zelda. Something similar to this:
We need to do a few things:
- Display a pointer, so the player knows which menu item is selected.
- Keep track of which menu item is selected so we can call the right functions
- Accept mouse/touch input in the menu items.
- Display the game logo
###Getting started
I’m using my Browserify template - while you can follow along even if you are not using it, I highly recommend it because it greatly simplifies code structure without requiring you to solve dependencies manually.
Before anything else, we preload our assets. I’m using my load state to preload them, so that everything is loaded in one place.
//load.js
module.exports = {
    preload: function() {
        game.load.image('menu_title', 'assets/menu_game_title.png');
        game.load.image('menu_arrow', 'assets/menu_arrow.png');
        game.load.image('menu_button1', 'assets/menu_button.png');
        game.load.image('menu_button2', 'assets/menu_button2.png');
        game.load.image('menu_button3', 'assets/menu_button3.png');
    }
};
The second step is creating the menu state.
//menu.js
module.exports = {
    create: function() {
        //Add the game title so we know the state is properly working
        this.gameTitle = game.add.image(
            game.world.centerX, game.world.centerY - 150, 'menu_title');
        this.gameTitle.anchor.setTo(0.5, 0.5);
    },

    update: function() {}
};
Simple enough.
###Displaying menu items
The easiest way to display menu items is with Phaser.Buttons. Since we are using Browserify, we will take full advantage of the modular nature of it. We can do it like so:
//menu_buttons.js
module.exports = {
    draw: function () {
        this.button1 =  game.add.button(game.world.centerX,
        game.world.centerY - 50, 'menu_button1', this.playState);
        this.button1.anchor.setTo(0.5, 0.5);

        this.button2 = game.add.button(game.world.centerX,
        game.world.centerY + 50, 'menu_button2', this.playState);
        this.button2.anchor.setTo(0.5, 0.5);

        this.button3 = game.add.button(game.world.centerX,
        game.world.centerY + 150, 'menu_button3', this.playState);
        this.button3.anchor.setTo(0.5, 0.5);
    },

    playState: function () {
        game.state.start('play');
    }
};
This won’t really work with a pointer and is ugly as hell. So we modify it a bit further:
//menu_buttons.js
module.exports = {
    //We track the offset of each button
    pos: [-50, 50, 150],
    //We track which callback each button has
    callbacks: ['playState', 'playState', 'playState'],
    draw: function () {
        //We now create our buttons using a constructor function, YAY!
        this.button1 = this.addButton(1, this.playState);
        this.button1.anchor.setTo(0.5, 0.5);

        this.button2 = this.addButton(2, this.playState);
        this.button2.anchor.setTo(0.5, 0.5);

        this.button3 = this.addButton(3, this.playState);
        this.button3.anchor.setTo(0.5, 0.5);
    },

    addButton: function (button, func) {
        return game.add.button(game.world.centerX,
        game.world.centerY + this.pos[button - 1],
        'menu_button' + button, func);
    },

    playState: function () {
        game.state.start('play');
    }
};
Awesome. It could be improved further but for now it is enough. Back on our menu.js, we do this:
//menu.js
var buttons = require('../entities/menu_buttons.js');

module.exports = {
    create: function() {
    buttons.draw();
    },

    update: function() {}
};
Bam! We have our buttons and they work fine with mouse input already. Cool.
###Adding the pointer
We create a new file for drawing, moving and tracking the pointer - I named mine arrow since the png for it is a small arrow. This one is a bit more complex so read the comments carefully.
module.exports = {
    draw: function () {
        //Add it with initial position at first button
        this.arrow = game.add.image(game.world.centerX - 100,
        game.world.centerY - 50, 'menu_arrow');
        this.arrow.anchor.setTo(0.5, 0.5);

        //Arrow will take 200ms to go up/down the menu
        this.arrow.moveDelay = 200;

        //Control if the arrow should keep moving or not
        this.arrow.canMove = true;

        //Keep track of the current button the pointer is at
        this.arrow.currentButton = 1;

        //We add an horizontal tween so that the arrow feels nicer
        game.add.tween(this.arrow)
            .to({
                x: this.arrow.x - 10
            }, 700, Phaser.Easing.Quadratic.Out)
            .to({
                x: this.arrow.x
            }, 400, Phaser.Easing.Quadratic.In)
            .loop()
            .start();
    },

    //Here we will set the rules for how it moves
    //We need to pass the variable holding the cursor keys
    //and the object that holds the buttons.
    move: function (cursors, buttons) {
        if (cursors.down.isDown && this.arrow.canMove) {
            //This stops the arrow from traveling way too fast
            this.arrow.canMove = false;

            //Which is reset to true after a 255ms delay
            this.allowMovement();

            if (this.arrow.currentButton === 1) {
                //I made a custom tween function for this
                this.tween(buttons, 2);
            } else if (this.arrow.currentButton === 2) {
                this.tween(buttons, 3);
            } else {
                this.tween(buttons, 1);
            }
        }

        if (cursors.up.isDown && this.arrow.canMove) {
            this.arrow.canMove = false;
            this.allowMovement();
            if (this.arrow.currentButton === 1) {
                this.tween(buttons, 3);
            } else if (this.arrow.currentButton === 2) {
                this.tween(buttons, 1);
            } else {
                this.tween(buttons, 2);
            }
        }

        if (game.input.keyboard.isDown(Phaser.Keyboard.ENTER)) {
            //This will activate the button that the pointer is at
            this.activateButton(buttons, this.arrow.currentButton);
        }
    },

    tween: function (buttons, buttonNum) {
        game.add.tween(this.arrow)
            .to({
                y: game.world.centerY + buttons.pos[buttonNum - 1]
            }, this.arrow.moveDelay, Phaser.Easing.Quadratic.In)
            .start();
        this.arrow.currentButton = buttonNum;
    },

    allowMovement: function () {
        game.time.events.add(255, (function () {
            this.arrow.canMove = true;
        }), this);
    },

    activateButton: function (buttons, currentButton) {
        buttons[buttons.callbacks[currentButton - 1]]();
    }
};
###Adding pointer to menu
The first thing we do is requiring the arrow file.
//menu.js
var arrow = require('../entities/menu_arrow.js');
Then we can call the arrow.draw() and arrow.move() in create and update, respectively.
//menu.js
module.exports = {
    create: function() {
    buttons.draw();
    arrow.draw();
    },

    update: function() {
    arrow.move();
    }
};
This will break though, because we need to pass the cursor keys and the buttons object for the arrow.move function. We can add keyboard interaction by adding the following line to menu.js’ create function:
this.cursors = game.input.keyboard.createCursorKeys();Our final menu.js file will look like this:
var buttons = require('../entities/menu_buttons.js'),
    arrow = require('../entities/menu_arrow.js');

module.exports = {
    create: function () {
        this.cursors = game.input.keyboard.createCursorKeys();
        this.gameTitle = game.add.image(game.world.centerX,
        game.world.centerY - 200, 'menu_title');
        this.gameTitle.anchor.setTo(0.5, 0.5);
        buttons.draw();
        arrow.draw(buttons, 1);
    },

    update: function () {
        arrow.move(this.cursors, buttons);
    }
};
###End Result
###Download template
You can download the template (including instructions for use with Browserify, loading screen and menu) at my github repo!
I hope this is helpful, let me know what you think. :)